Memorial Stadium 3D Puzzle
The Memorial Stadium 3D Puzzle box contains 133 individual pieces on 6 puzzle boards. Assembly instructions, a battery box (batteries not included), 1 sheet of stickers, and 1 small piece of sandpaper.
Items you will need to complete the puzzle are: A small phillips screwdriver and 2 AAA batteries. A small file or exacto knife may be helpful as well.
KEEP PUZZLE PIECES, TOOLS, SHARP OBJECTS, ETC AWAY FROM YOUNG CHILDREN AND PETS.
Assembly time can take several hours. Be prepared to have a uncluttered tabletop space, large enough and out of the way so pieces don’t get lost if left unattended.
Suggestions:
- Do not remove puzzle pieces until you are ready for assembly of that piece. If pieces fall out of the boards they should be replaced until ready for assembly.
- Some pieces may look identical but vary slightly. A good example are pieces “A15” and “A19”. Follow the assembly instructions carefully to make sure each piece is in the correct location.
- Glueing pieces together is not necessary. However, if you choose to make the puzzle more secure by glueing, a fast setting white glue or hot glue gun is recommended. White glue is more forgiving, short term anyway. One piece (#3 “D5" ) should not be glued. This piece needs to be removed in order to replace batteries when necessary.
- So you can keep track of where you left off, use a highlight marker to cross off each of the 25 assembly sections as they’re completed.
We will be adding assembly photos, more detailed instructions with larger print and possibly a YouTube video of the entire assembly process. Until then, the following photos and tips should be of help.
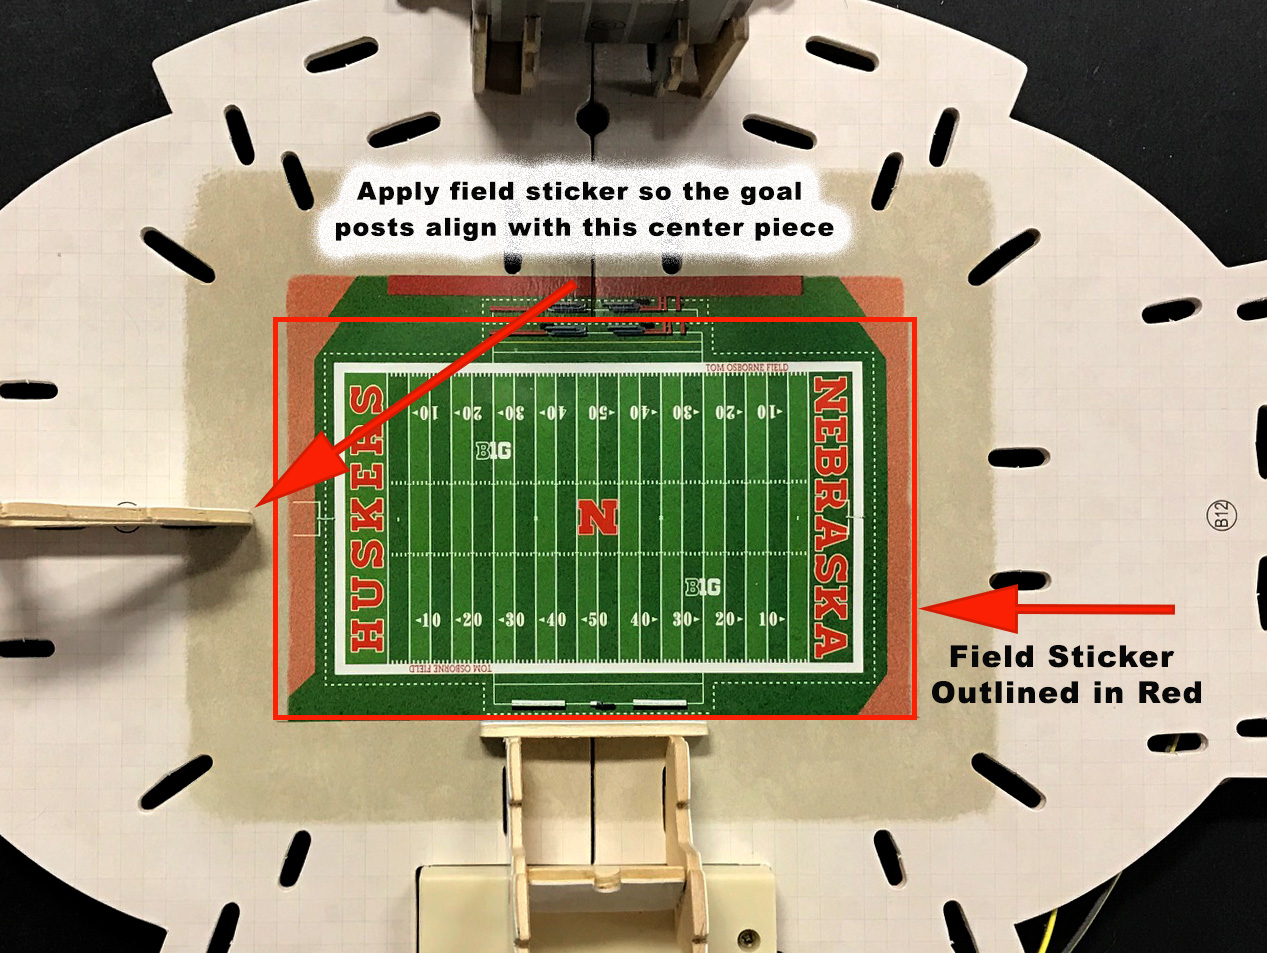
1.) You may notice the two pre-printed pieces that make up the playing field are not centered. Don’t be concerned since the playing field sticker will cover the seam and be centered.
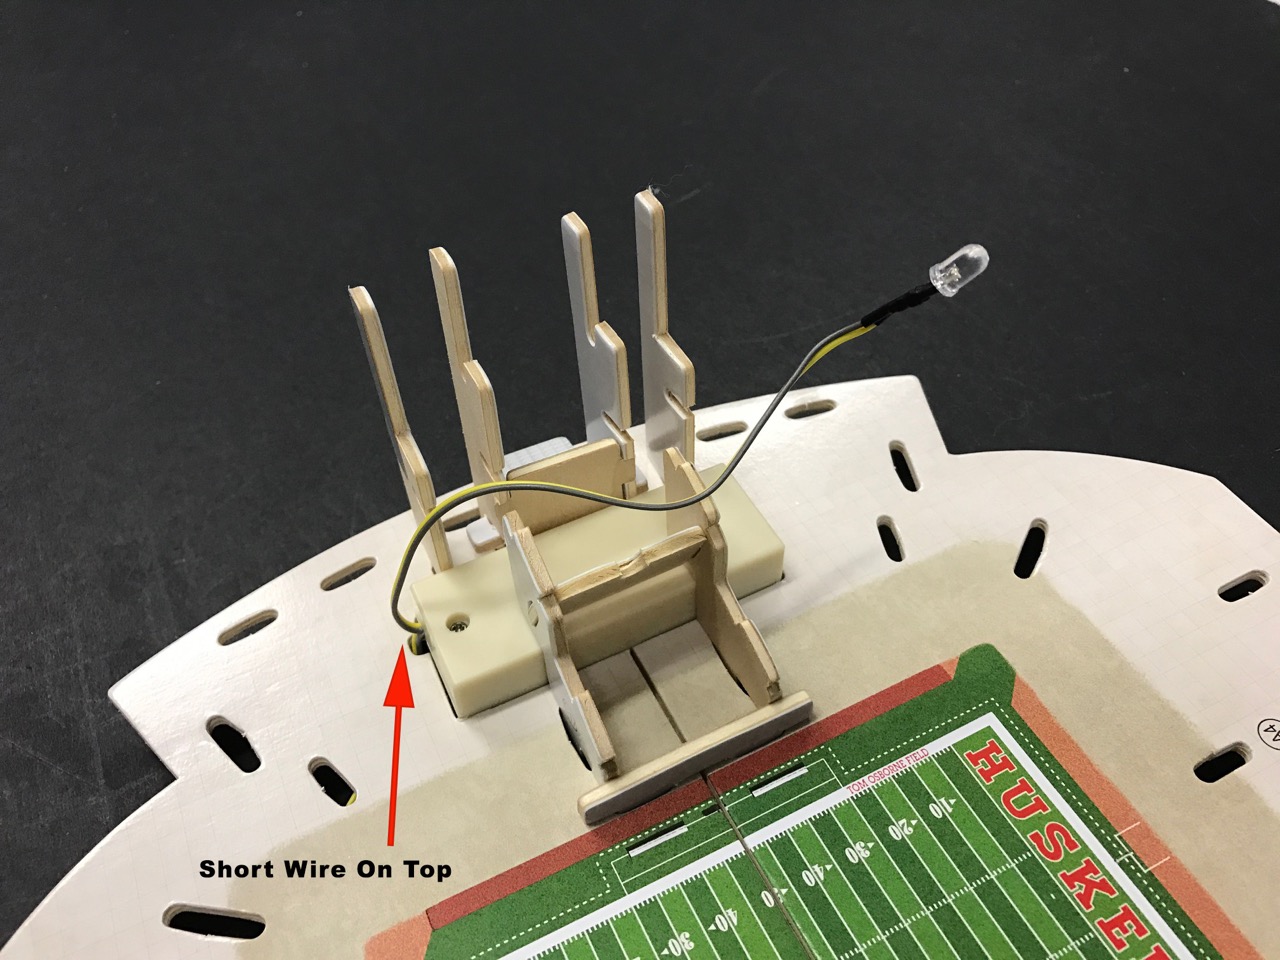
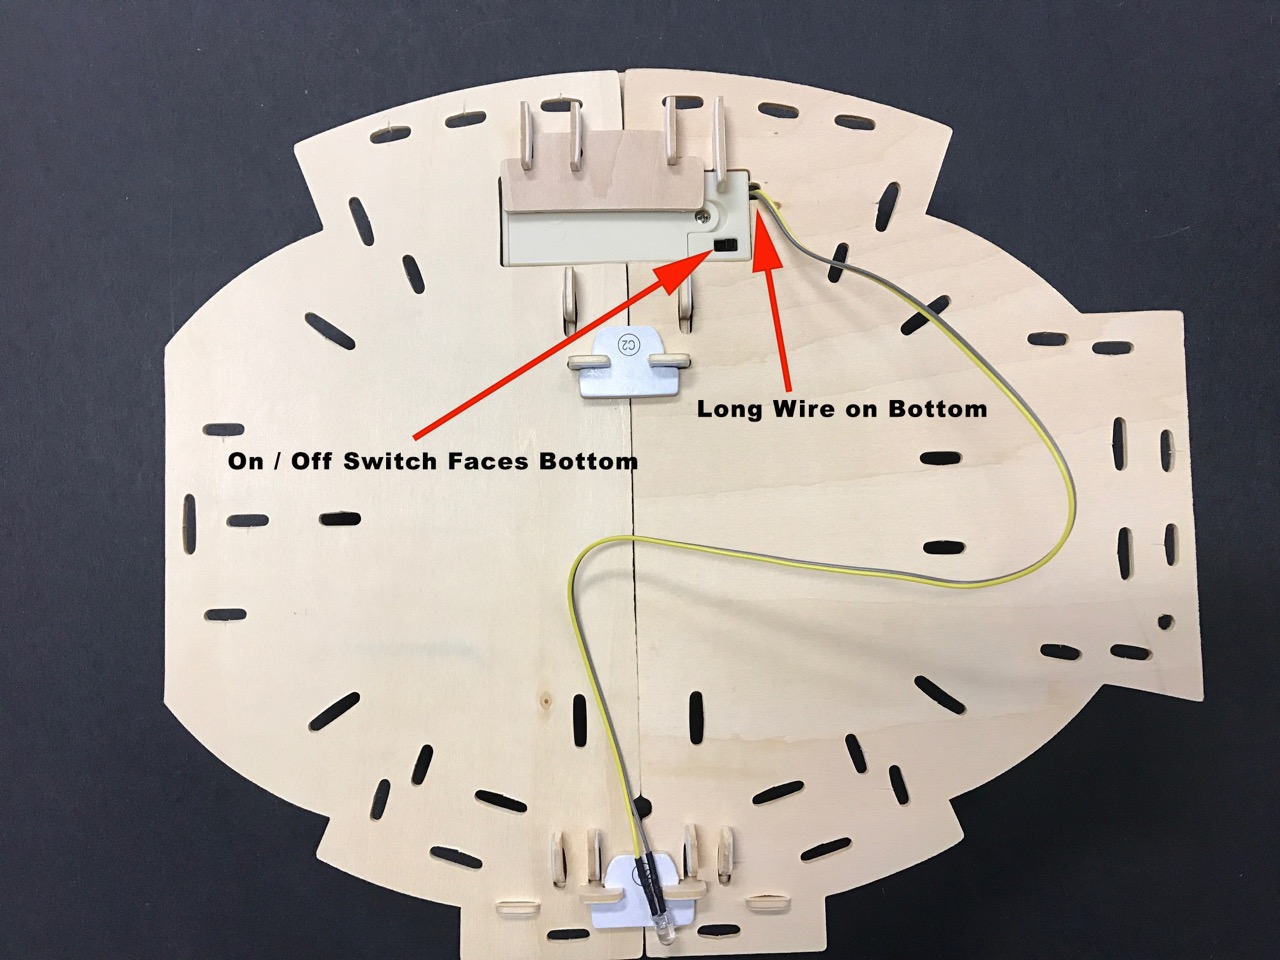
2.) BATTERY BOX - To insert batteries remove the small phillips screw next to the black on/off switch. When it’s time to insert the battery box in the puzzle the small wire goes up, on top of the playing field. The long wire goes underneath. Make sure the black on/off switch on the battery box is facing down when inserting into the puzzle opening. After completion, Scotch tape the long wire to the puzzle bottom in several places.
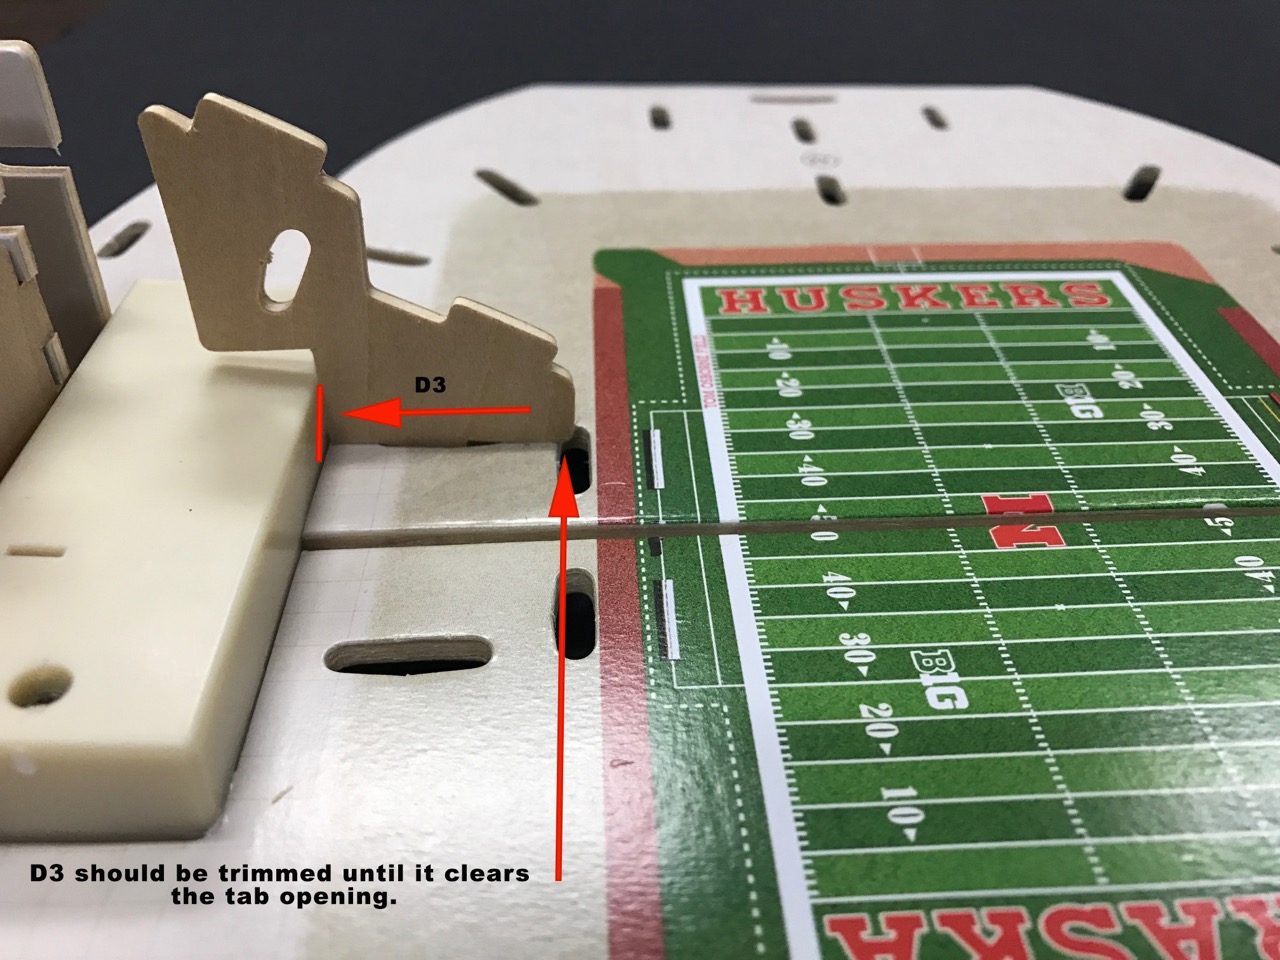
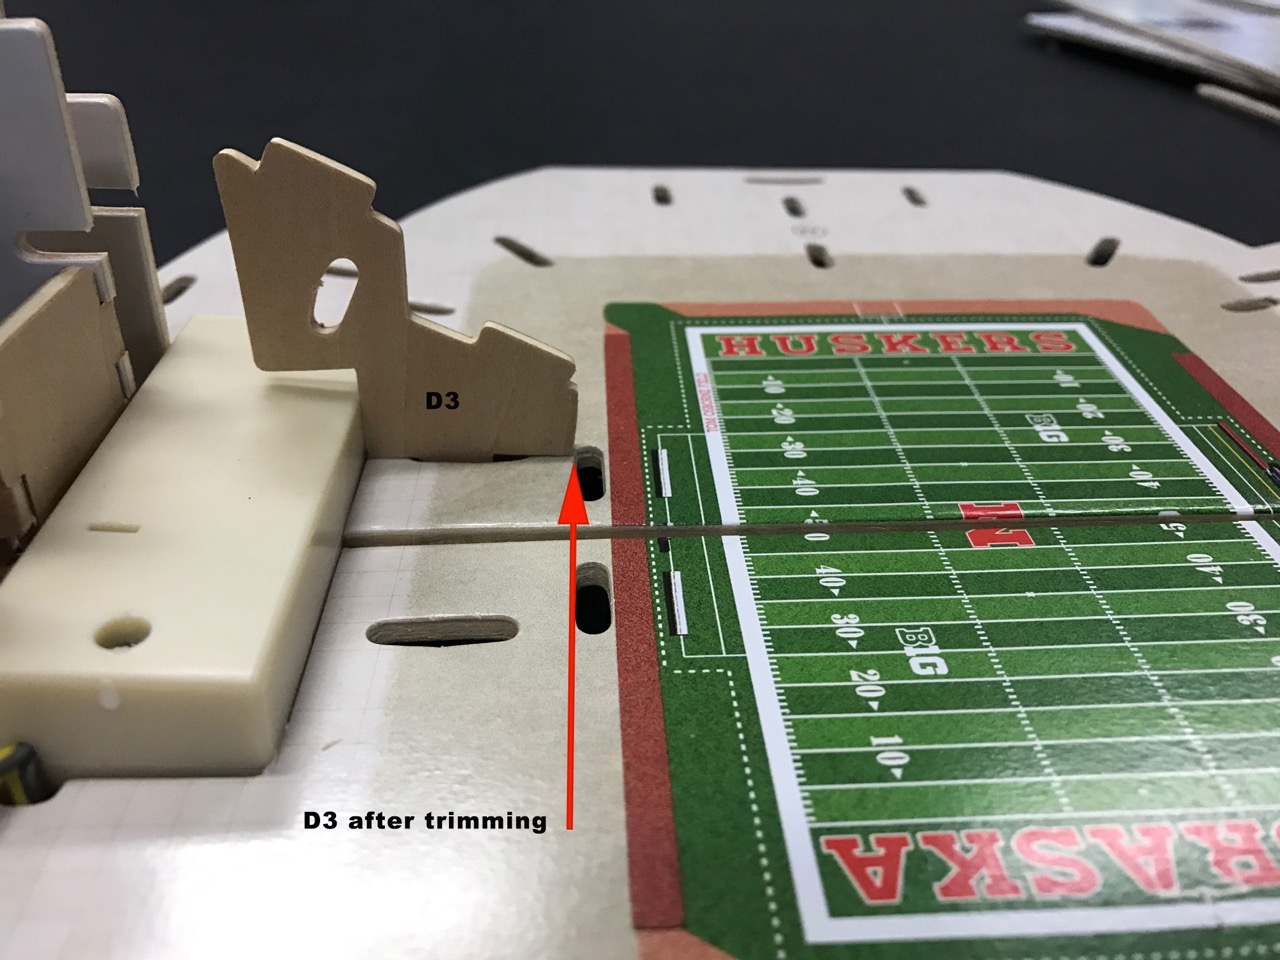
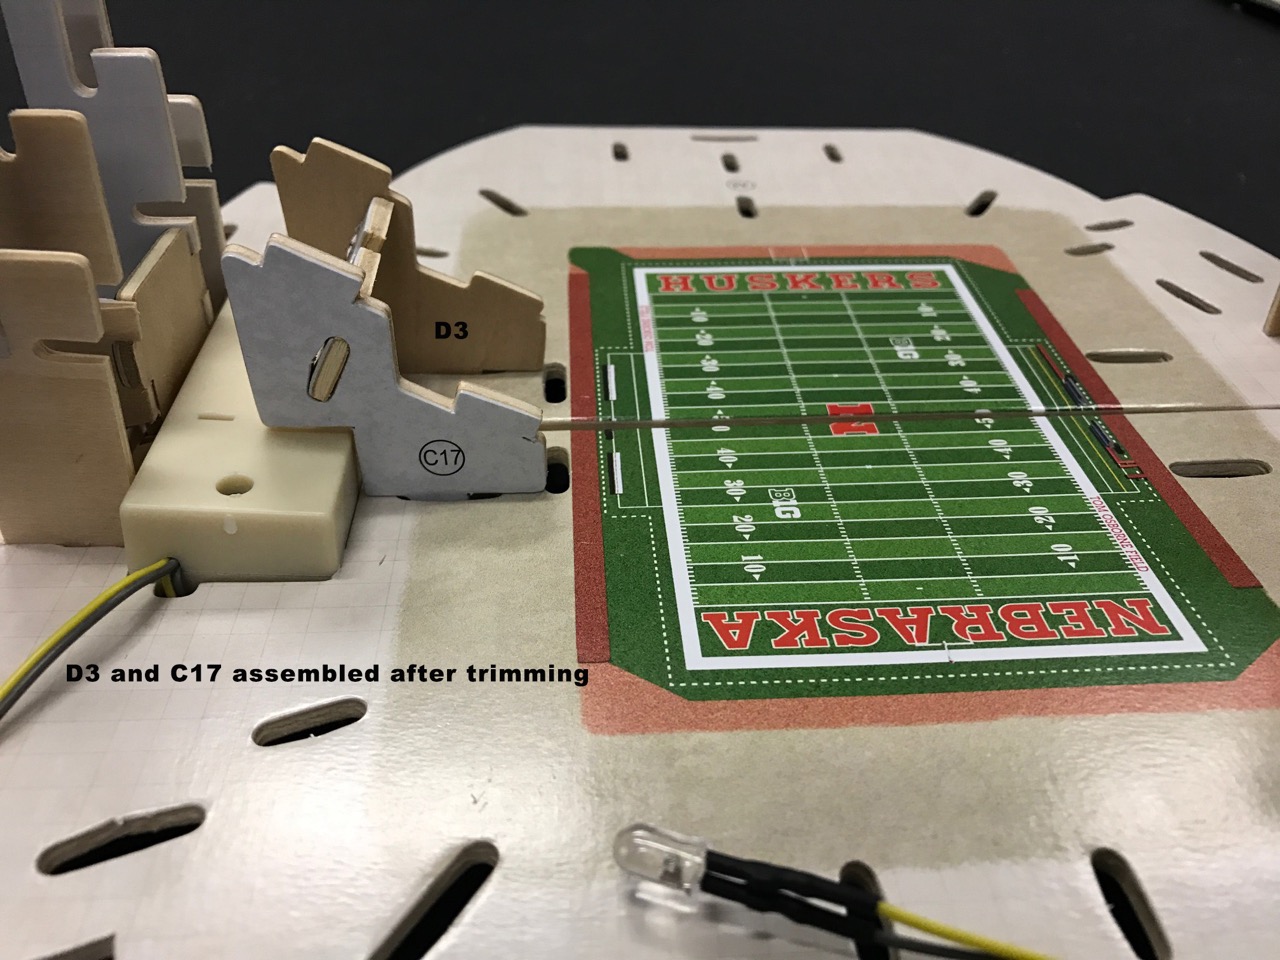
3.) Assembly section #5 - Before completing the sub-assembly of C17, D3 and A14 insert C17 and D3 into their respective slots and slide towards the battery box. It may be necessary to slightly trim the tail end of these two parts to clear the tab opening for piece #E4 to insert in the next step. Once trimmed, complete the sub-assembly of C17, D3 and A14 and slide into position.
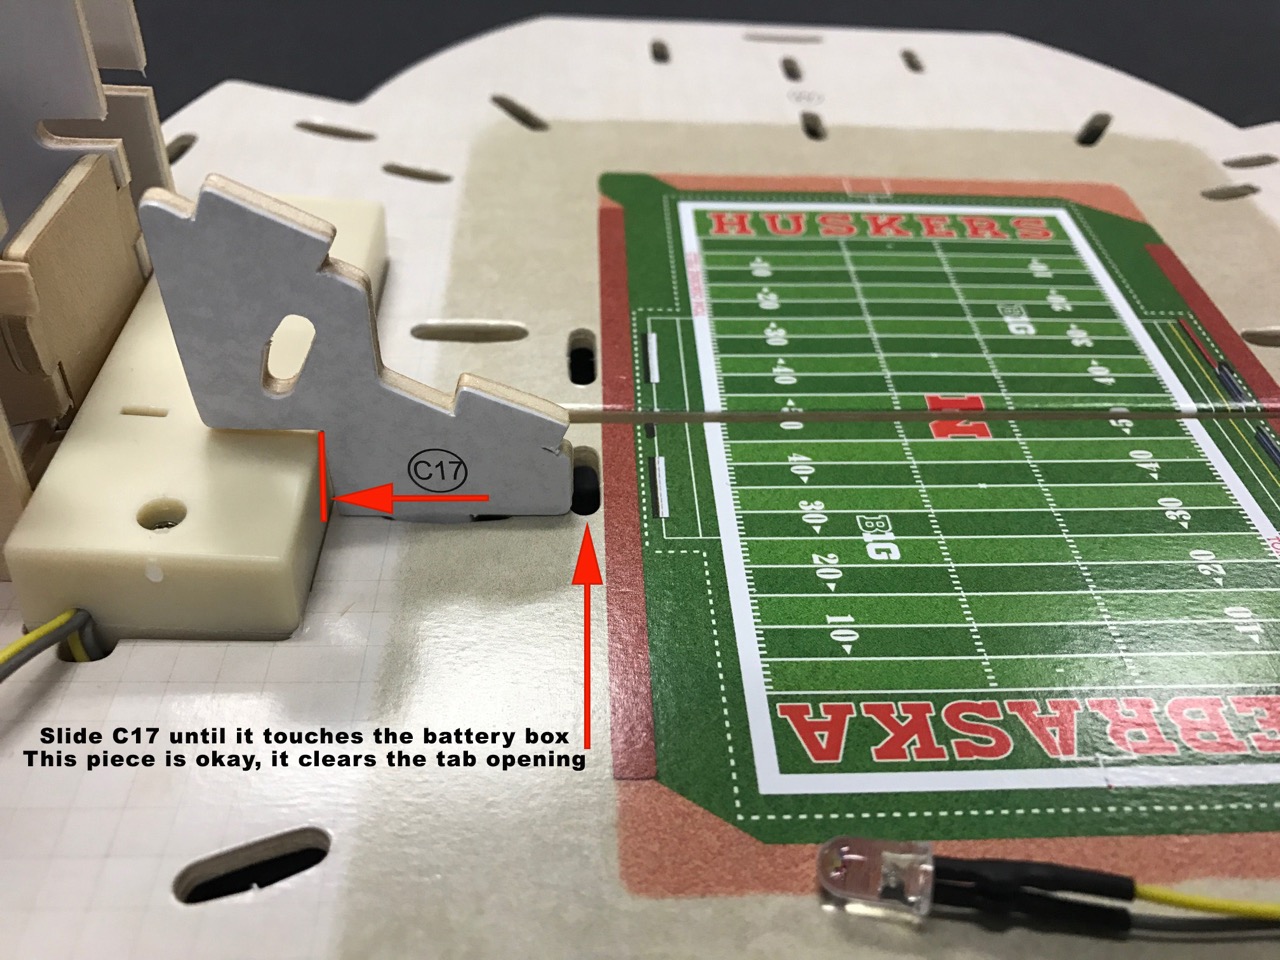
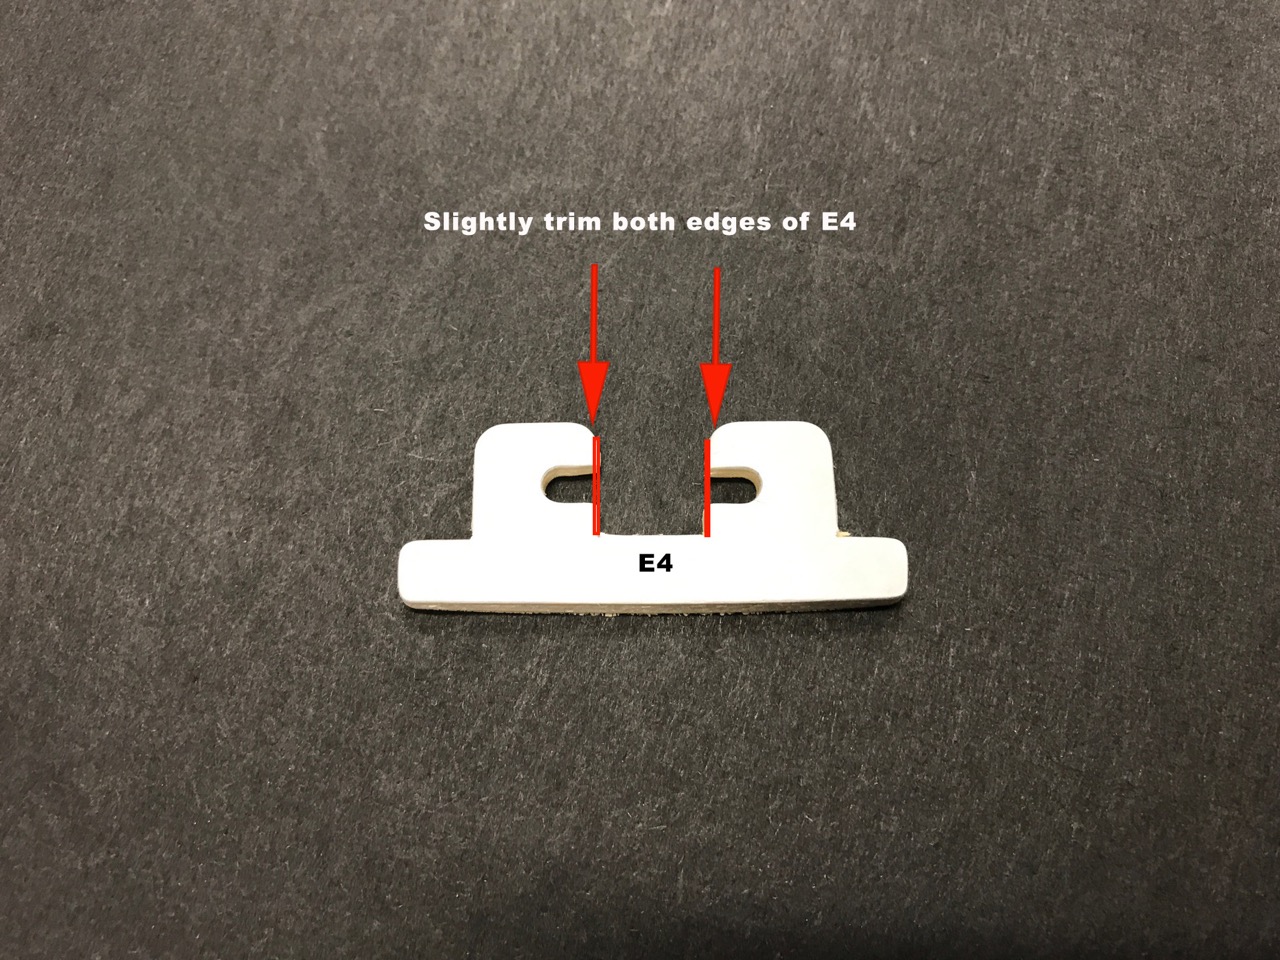
Puzzle piece E4 may need to be slightly trimmed so it inserts easily into the tab opening. If necessary, trim a little at a time until it inserts all the way. Then lock into position underneath with piece #C2.
Click here for PDF assembly instructions
There are 25 sections in the assembly instructions. Proceed to Section 1 Assembly Photos